- OverviewOverview
- FUN TIMEFUN TIME
- GoalGoal
- LEARNING OBJECTIVESLEARNING OBJECTIVES
- SCIENTIFIC CONCEPTSSCIENTIFIC CONCEPTS
- GRADEGRADE
- TIMETIME
- GET READYGET READY
- PROCEEDUREPROCEEDURE
Bridge of Curiosity is an exciting STEM-based activity to determine the load bearing capacities of simple structures when connected in a special arrangement to construct a bridge: TRUSS. This activity has been presented with an outer-space background story in which the participants are provided a few goals to achieve,alongside a story line.
Bridge of Curiosity is an exciting STEM-based activity to determine the load bearing capacities of simple structures when connected in a special arrangement to construct a bridge: TRUSS. This activity has been presented with an outer-space background story in which the participants are provided a few goals to achieve,alongside a story line.
Engineer, test your bridge building skills at:
(https://www.crazygames.com/game/bridge-builder)
Engineer, test your bridge building skills at:
(https://www.crazygames.com/game/bridge-builder)
To construct a strong bridge out of basic and easy to obtain materials
| Items needed | Quantity required | Checklist |
| Popsicle sticks or Tongue depressors | 50 | ? |
| Hot glue sticks | 2 | ? |
| Heavy books | 4 (More if necessary) | ? |
| Scissors | 1 | ? |
| Hot glue gun | 1 | ? |
To construct a strong bridge out of basic and easy to obtain materials
| Items needed | Quantity required | Checklist |
| Popsicle sticks or Tongue depressors | 50 | ? |
| Hot glue sticks | 2 | ? |
| Heavy books | 4 (More if necessary) | ? |
| Scissors | 1 | ? |
| Hot glue gun | 1 | ? |
I. Understand the different mechanics behind bridge design such as trusses, weight distribution, etc.
II. To be able to observe and apply Newton’s 3rd law during the testing phase of the session.
III. Analyze the load bearing capability of the bridge and the quality of engineering.
I. Understand the different mechanics behind bridge design such as trusses, weight distribution, etc.
II. To be able to observe and apply Newton’s 3rd law during the testing phase of the session.
III. Analyze the load bearing capability of the bridge and the quality of engineering.
I. Newtons laws
II. Distribution of Force Vectors
III. Trusses, Isogrids & Orthogrids
I. Newtons laws
II. Distribution of Force Vectors
III. Trusses, Isogrids & Orthogrids
Gr 6 – 10
Gr 6 – 10
30-45 min
30-45 min
Imagine you were on another planet like Mars. You are in your Rover and you are exploring the vast desert landscape. You’ve travelled many hours from your home base and you have just noticed a menacing dust storm in the distance. You look at your GPS and realize that you are actually not very far from your home base it’s just that there is a deep and perilous ravine in your path that your Rover cannot cross which is why you had to go around it. You know that if you took the long way back, you would not make it in time to avoid the dust storm. Luckily you have some planks of carbon fiber construction material and connectors. You decide now is as good a time as any to test your speed and skill and build a bridge over the ravine. You remember everything you learnt in Engineering 101 and start thinking about Trusses and weight distribution. Suddenly numbers are flying across your eyes. You take into consideration the weight of the Rover and yourself and the Martian gravity. You use your Ultrasonic sensor to measure the width of the Ravine. You make the bridge as fast as possible and lower it across with help from your Rover, It’s very lightweight but incredibly sturdy. You drive over it and make your way back to home base to tell everyone about your adventure.
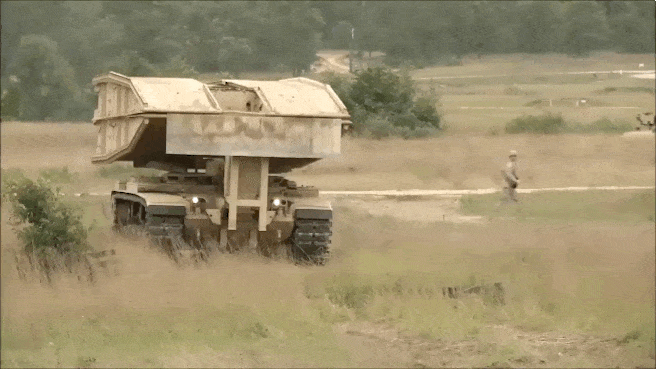
Bridges are very useful and the ability to quickly deploy them can be the difference between life and death in some situations. This is why the military has specific vehicles that can build a bridge in under 5 minutes. These bridges are up to 60 feet in length and can carry as much as 70 tons! This allows them to quickly escape or quickly advance where otherwise they would find themselves stuck.
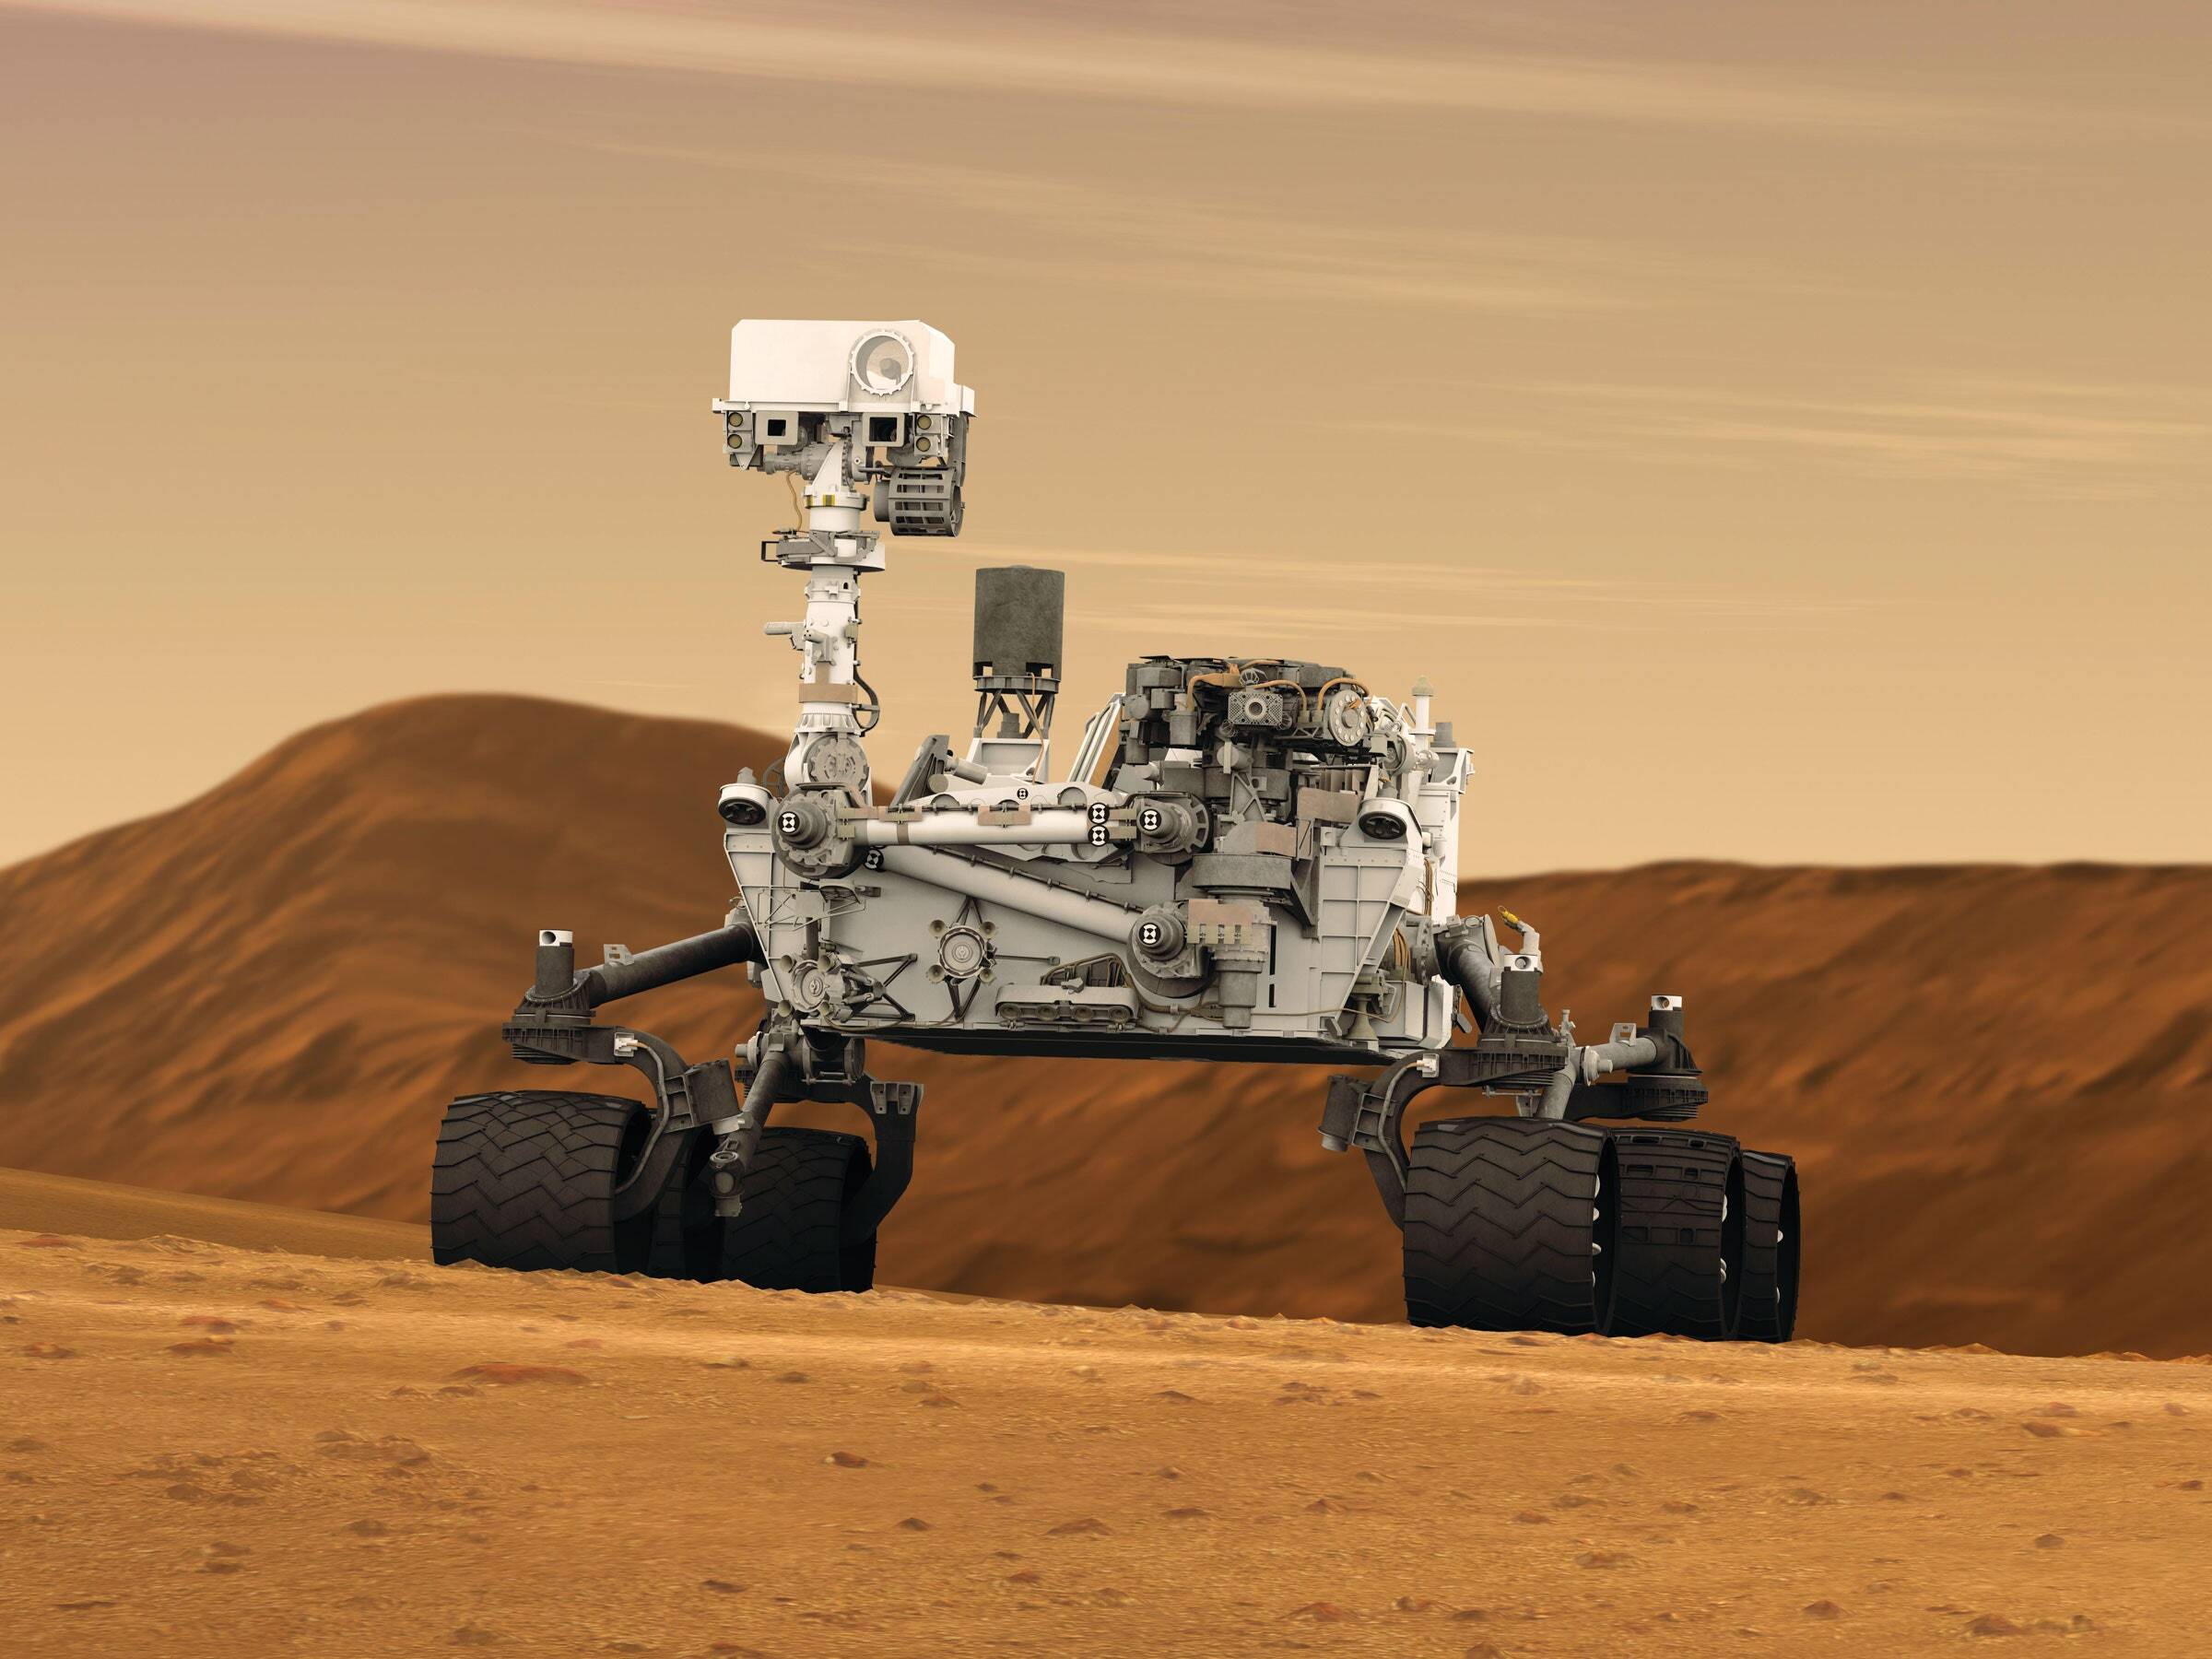
Imagine you were on another planet like Mars. You are in your Rover and you are exploring the vast desert landscape. You’ve travelled many hours from your home base and you have just noticed a menacing dust storm in the distance. You look at your GPS and realize that you are actually not very far from your home base it’s just that there is a deep and perilous ravine in your path that your Rover cannot cross which is why you had to go around it. You know that if you took the long way back, you would not make it in time to avoid the dust storm. Luckily you have some planks of carbon fiber construction material and connectors. You decide now is as good a time as any to test your speed and skill and build a bridge over the ravine. You remember everything you learnt in Engineering 101 and start thinking about Trusses and weight distribution. Suddenly numbers are flying across your eyes. You take into consideration the weight of the Rover and yourself and the Martian gravity. You use your Ultrasonic sensor to measure the width of the Ravine. You make the bridge as fast as possible and lower it across with help from your Rover, It’s very lightweight but incredibly sturdy. You drive over it and make your way back to home base to tell everyone about your adventure.
Bridges are very useful and the ability to quickly deploy them can be the difference between life and death in some situations. This is why the military has specific vehicles that can build a bridge in under 5 minutes. These bridges are up to 60 feet in length and can carry as much as 70 tons! This allows them to quickly escape or quickly advance where otherwise they would find themselves stuck.
Collect all the material needed for the experiment

- Warning – The hot glue gun runs off mains electricity which is dangerous. Always have adult supervision when using electrical appliances
- Warning – The hot glue gun gets VERY HOT. Handle with care and wear gloves. Keep it away from any flammable surfaces. Always have adult supervision when using a hot glue gun.
Start by plugging in the Hot Glue gun and letting it heat up with a stick of hot melt glue in it. When the glue becomes hot it becomes soft and runny and it can be used to stick things together.
Put a small blob of the melted hot glue on one side of one corner of a popsicle stick and stick another stick on it as follows.
Wait about 10 seconds so that the glue cools down and becomes solid, then attach a third stick with hot glue like this.
Now continue attaching more sticks by following the pictures below.
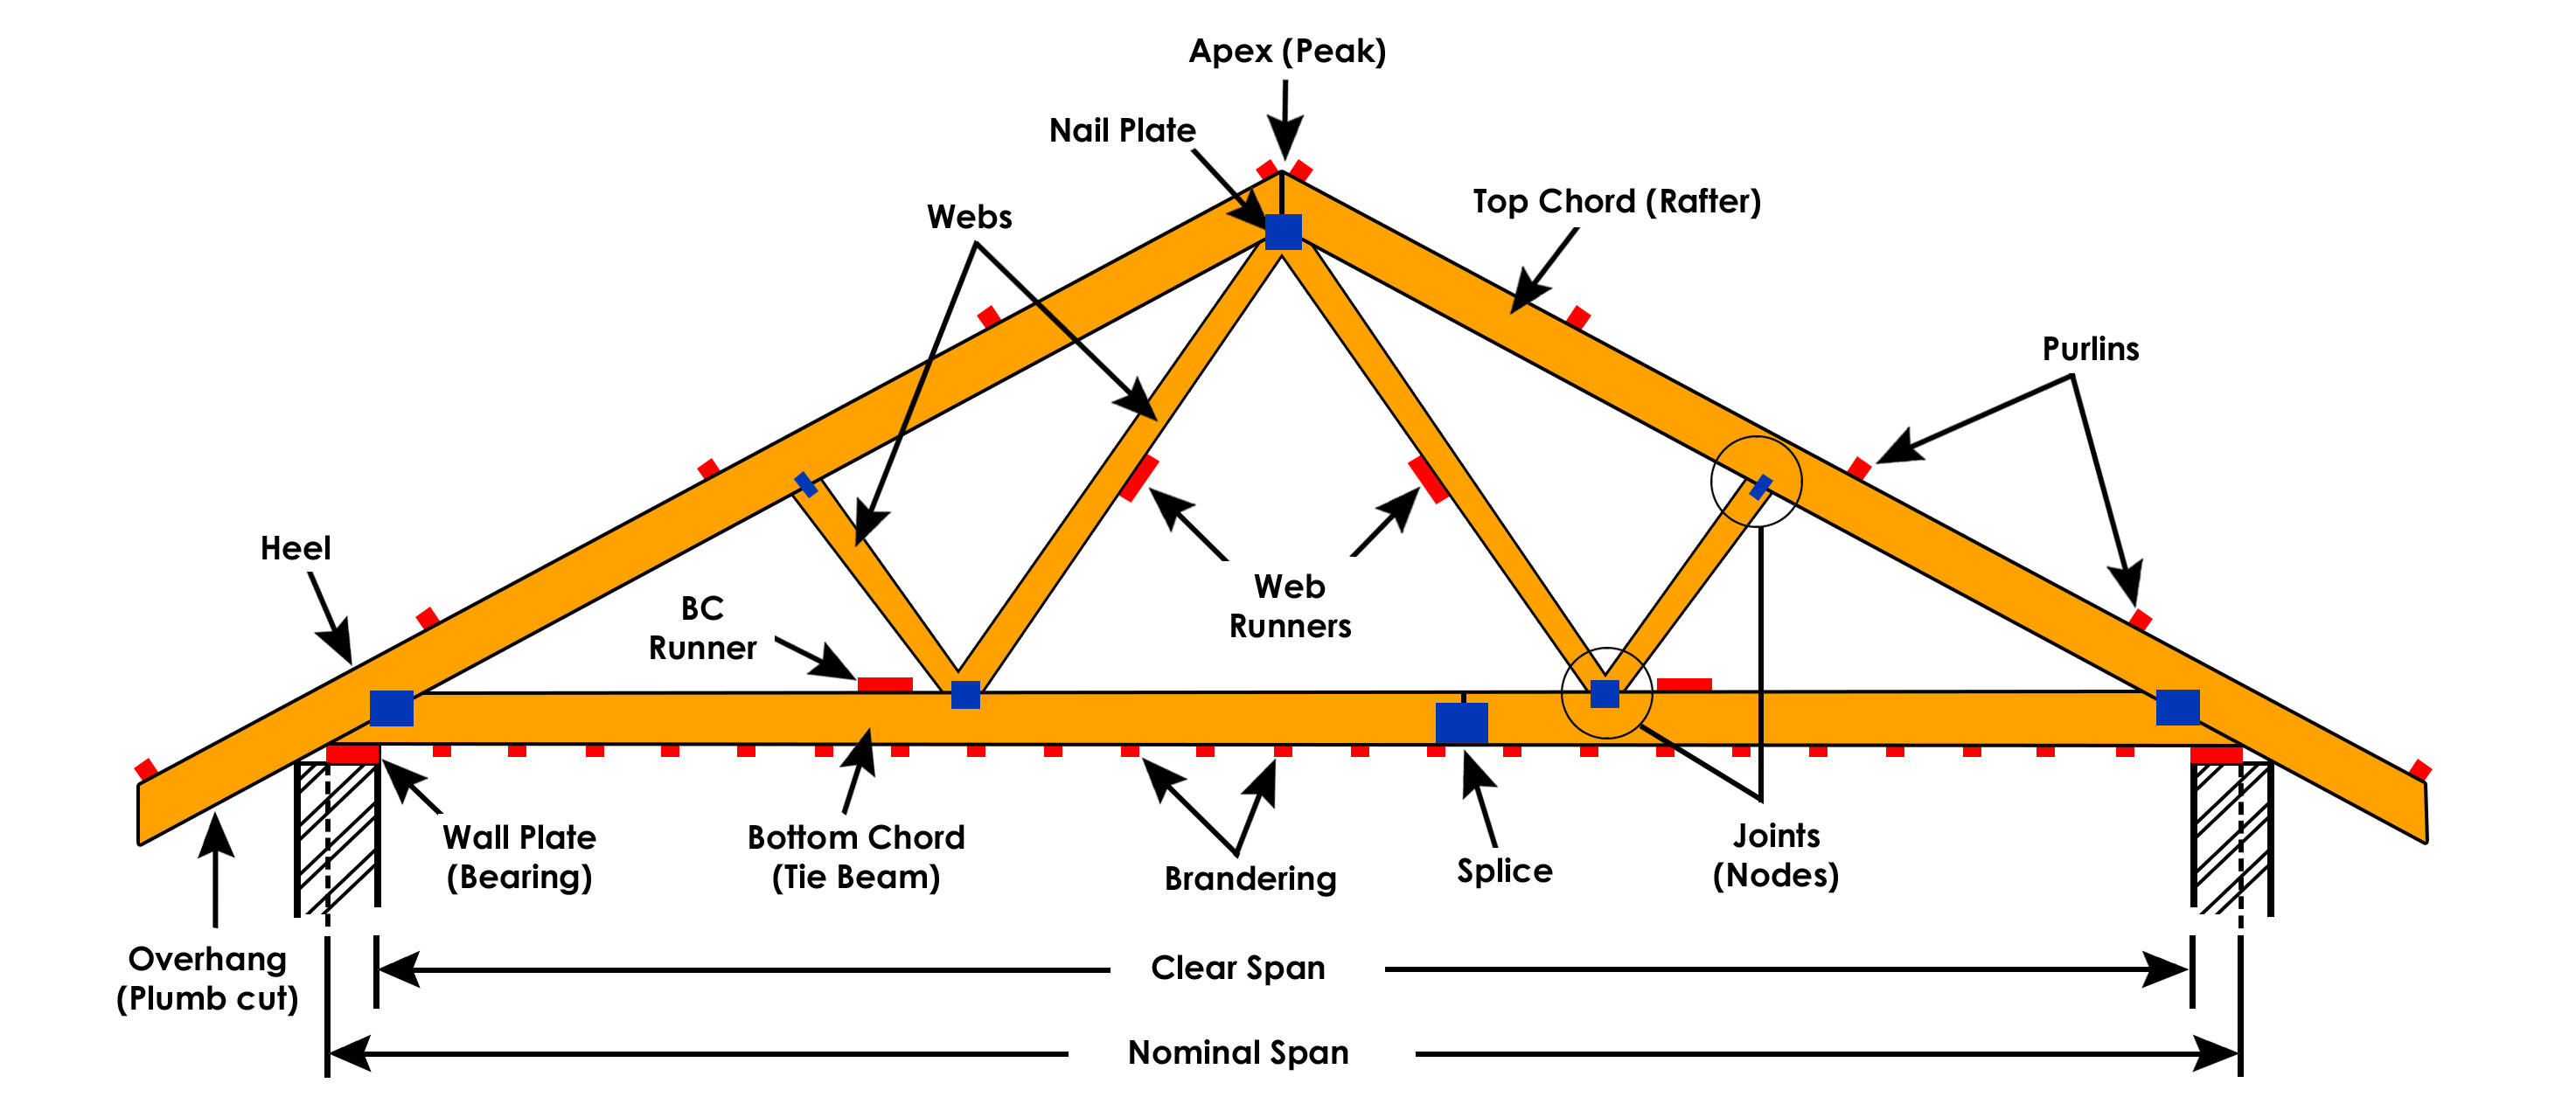
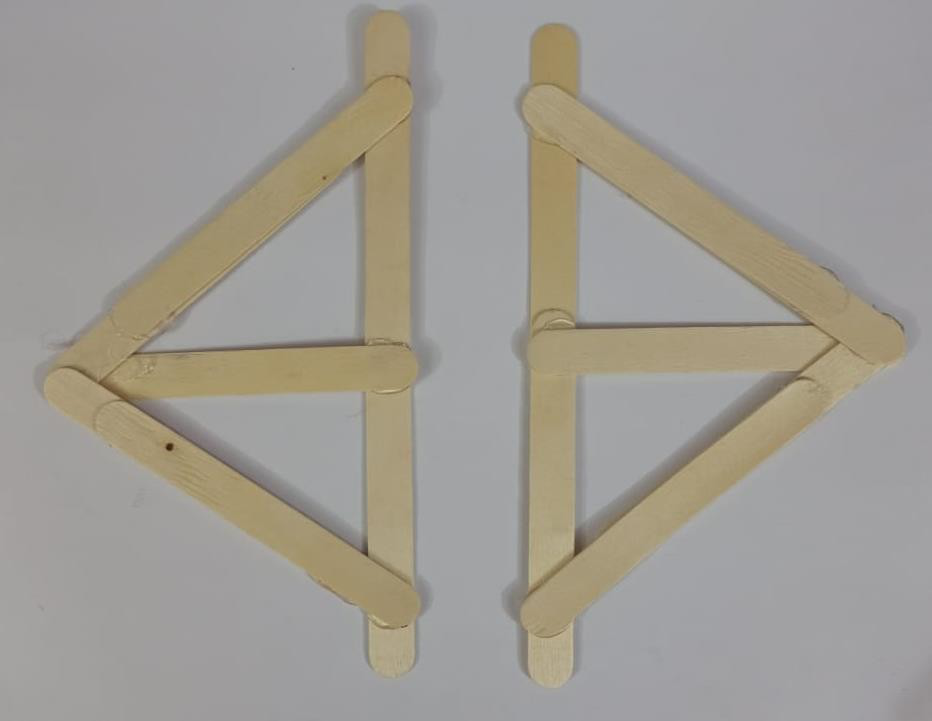
You will need to make 2 of these. They are called trusses!
I hope you have some heavy books!

We're going to use these books to hold the two trusses upright so that we can attach them together. Make sure the gap is less than the length of one popsicle stick!

Now start attaching the popsicle sticks to the top with hot glue like this.

Now that we have a good base, we can start crisscrossing more sticks to make a good solid flat plane.

Your bridge should look like this.


Now turn your bridge upside down so that we can strengthen the underside as well.

Attach the sticks like this.


Your bridge should look like this now.

Next put your bridge over a gap either between 2 tables or 2 piles of books. Start putting the books on top!


DID YOU KNOW?
You can use more materials to make your bridge bigger, stronger and longer! The only limit is your imagination!
Collect all the material needed for the experiment
- Warning – The hot glue gun runs off mains electricity which is dangerous. Always have adult supervision when using electrical appliances
- Warning – The hot glue gun gets VERY HOT. Handle with care and wear gloves. Keep it away from any flammable surfaces. Always have adult supervision when using a hot glue gun.
Start by plugging in the Hot Glue gun and letting it heat up with a stick of hot melt glue in it. When the glue becomes hot it becomes soft and runny and it can be used to stick things together.
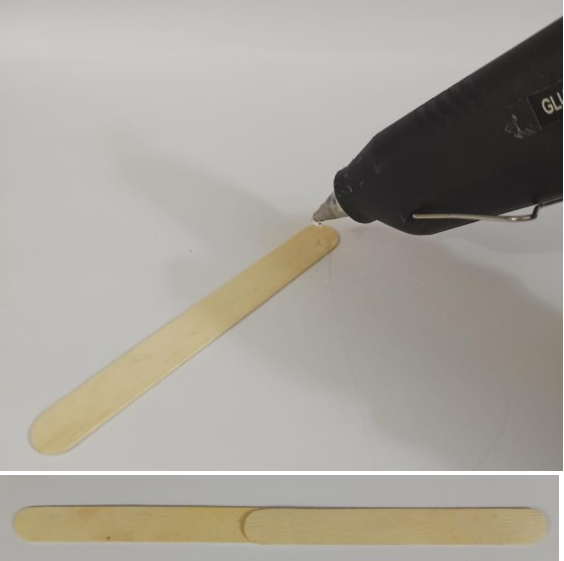
Put a small blob of the melted hot glue on one side of one corner of a popsicle stick and stick another stick on it as follows.
Wait about 10 seconds so that the glue cools down and becomes solid, then attach a third stick with hot glue like this.
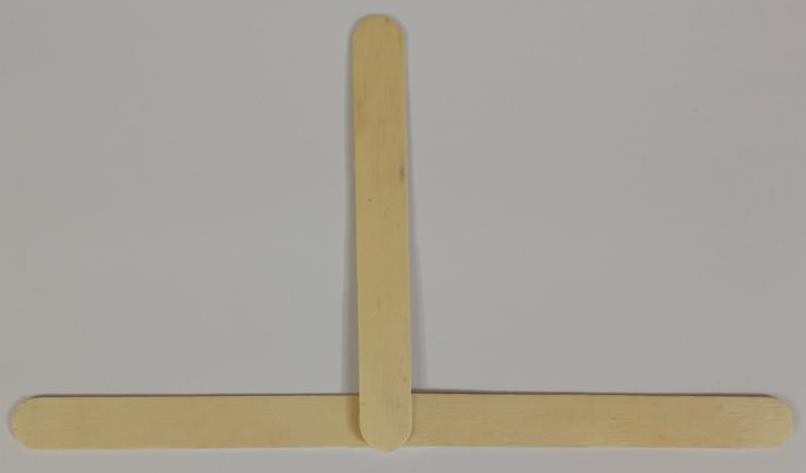
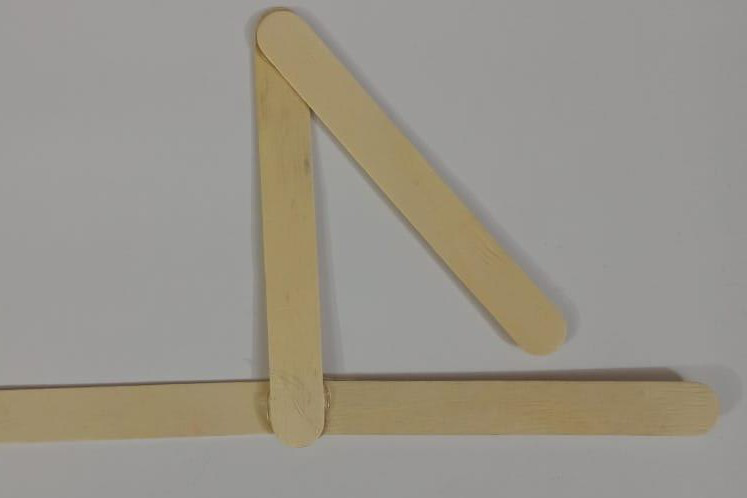
Now continue attaching more sticks by following the pictures below.
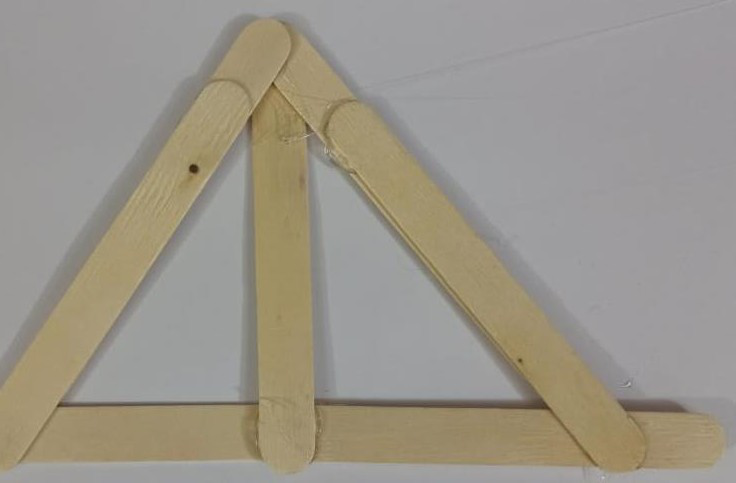
You will need to make 2 of these. They are called trusses!
I hope you have some heavy books!
We're going to use these books to hold the two trusses upright so that we can attach them together. Make sure the gap is less than the length of one popsicle stick!
Now start attaching the popsicle sticks to the top with hot glue like this.
Now that we have a good base, we can start crisscrossing more sticks to make a good solid flat plane.
Your bridge should look like this.
Now turn your bridge upside down so that we can strengthen the underside as well.
Attach the sticks like this.
Your bridge should look like this now.
Next put your bridge over a gap either between 2 tables or 2 piles of books. Start putting the books on top!
DID YOU KNOW?
You can use more materials to make your bridge bigger, stronger and longer! The only limit is your imagination!